


|
|
Prerequisites
Log in to the SAP NetWeaver support portal with admin credentials. Download the appropriate SAP Java Connector (32-bit or 64-bit), based on the architecture deployed in your machine. Unzip the downloaded file, copy the sapjco3.jar and the sapjco3.dll files, and paste them in the lib folder (default location: Installation directory/lib).
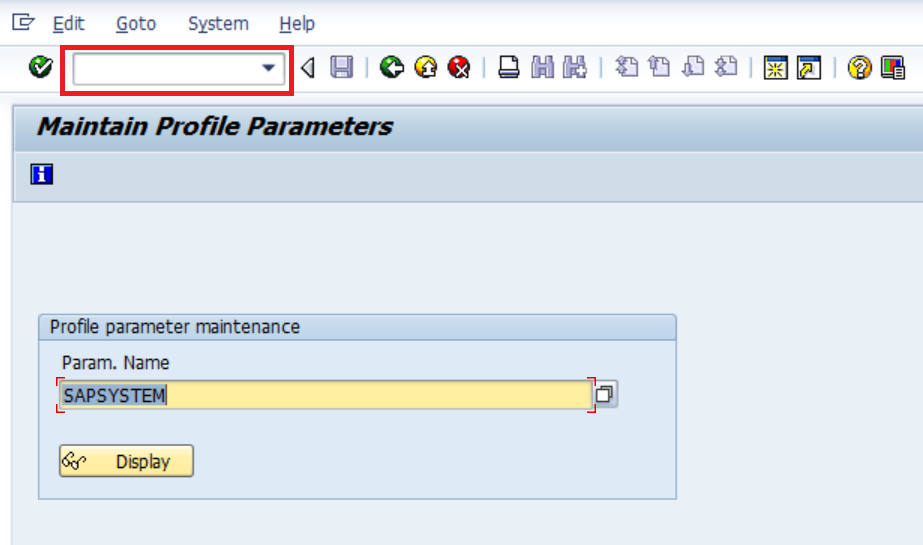
Log in to SAP NetWeaver portal as an administrator. Enter RZ11 in the T-code field at the top-left corner of the desktop console. In the Param. Name field, enter SAPSYSTEM. Click Display.
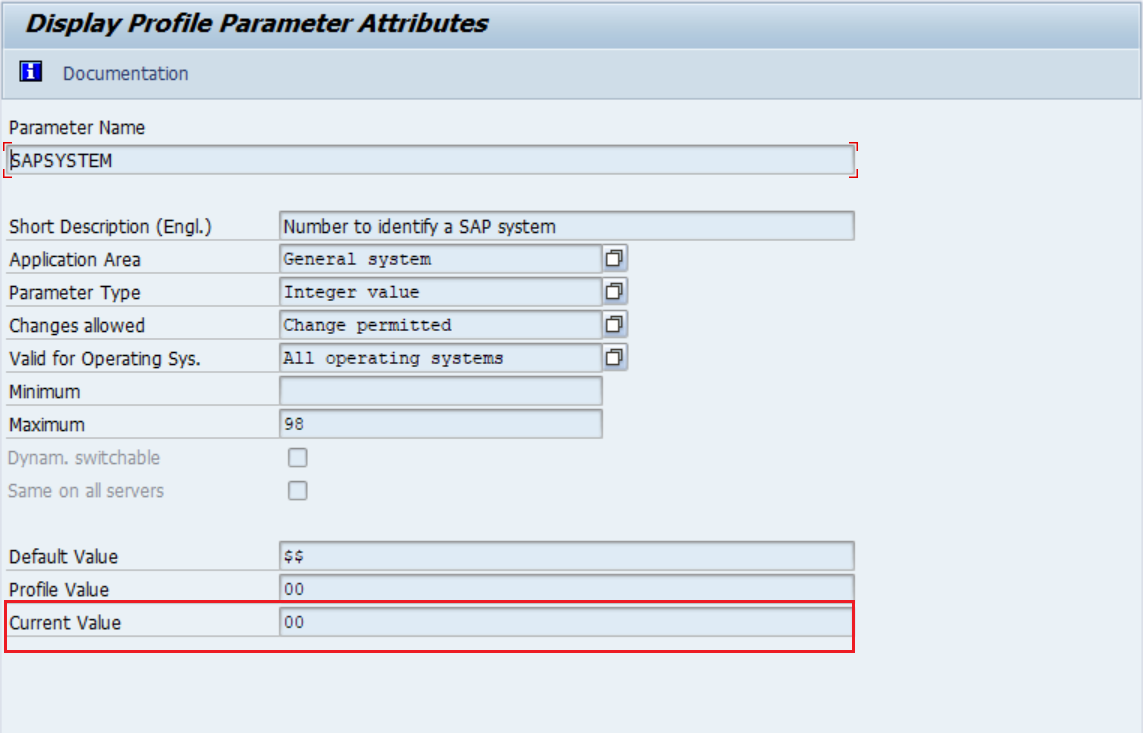
In the Display Profile Parameter Attribute window that opens, make a note of the value in the Current Value field.
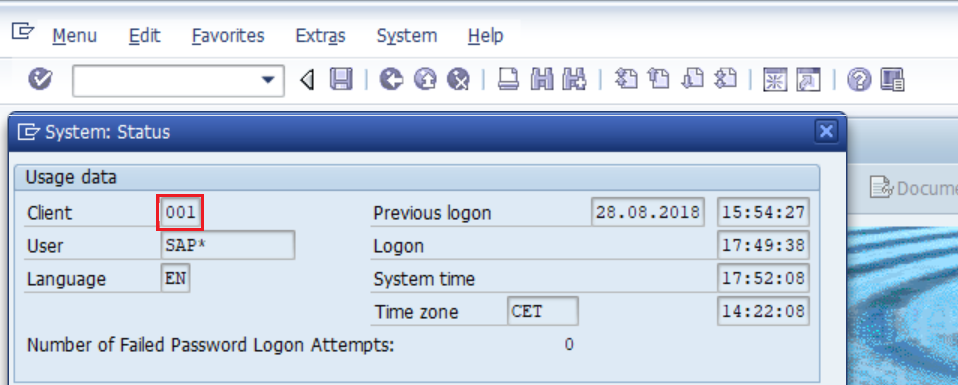
Navigate to System → Status. In the window that opens, find your Client ID and make a note of it.
Configuration steps in ADSelfService Plus
Log in to ADSelfService Plus console with admin credentials.
Go to Configuration → Self-Service → Password Sync/Single Sign On.
In the dashboard presented, click the SAP NetWeaver link. You’ll now be redirected to the SAP NetWeaver Configuration page.
Enter the System Name/IP Address of the server on which SAP NetWeaver is deployed.
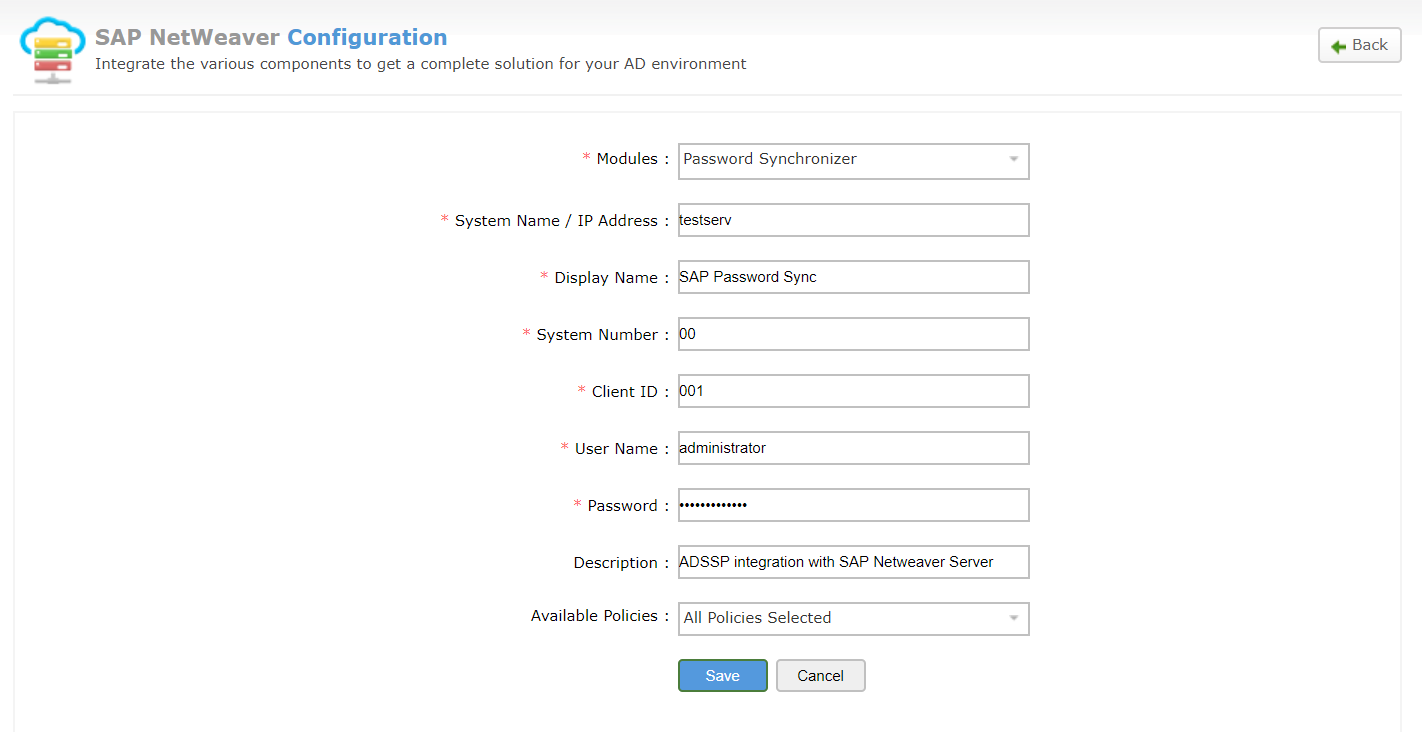
Enter an appropriate Display Name.
Enter the System Number obtained from the SAP NetWeaver (Refer step 2 of prerequisites).
Enter the Client ID obtained from the SAP NetWeaver portal (Refer step 3 of prerequisites).
Enter the User Name and Password of a user account with super admin role in SAP NetWeaver.
Enter an appropriate Description.
From the Available Policies drop-down list, select the policies for which the synchronization of passwords must occur.
Click Save.
|
|