


|
|
Introduction
Password Synchronization allows end-users to use a single identity, subject to a single password policy, across various systems and applications. ADSelfService Plus has a robust password synchronization technique that now supports even the native Windows password changes using the "Password Sync Agent".
The Password Sync Agent, when installed on the domain controllers in your domain, intercepts native password changes (e.g.: password change via Ctrl+Alt+Del screen or password reset by admins in ADUC console), encrypts the new passwords, and automatically synchronizes them with multiple systems and applications.
How it works?
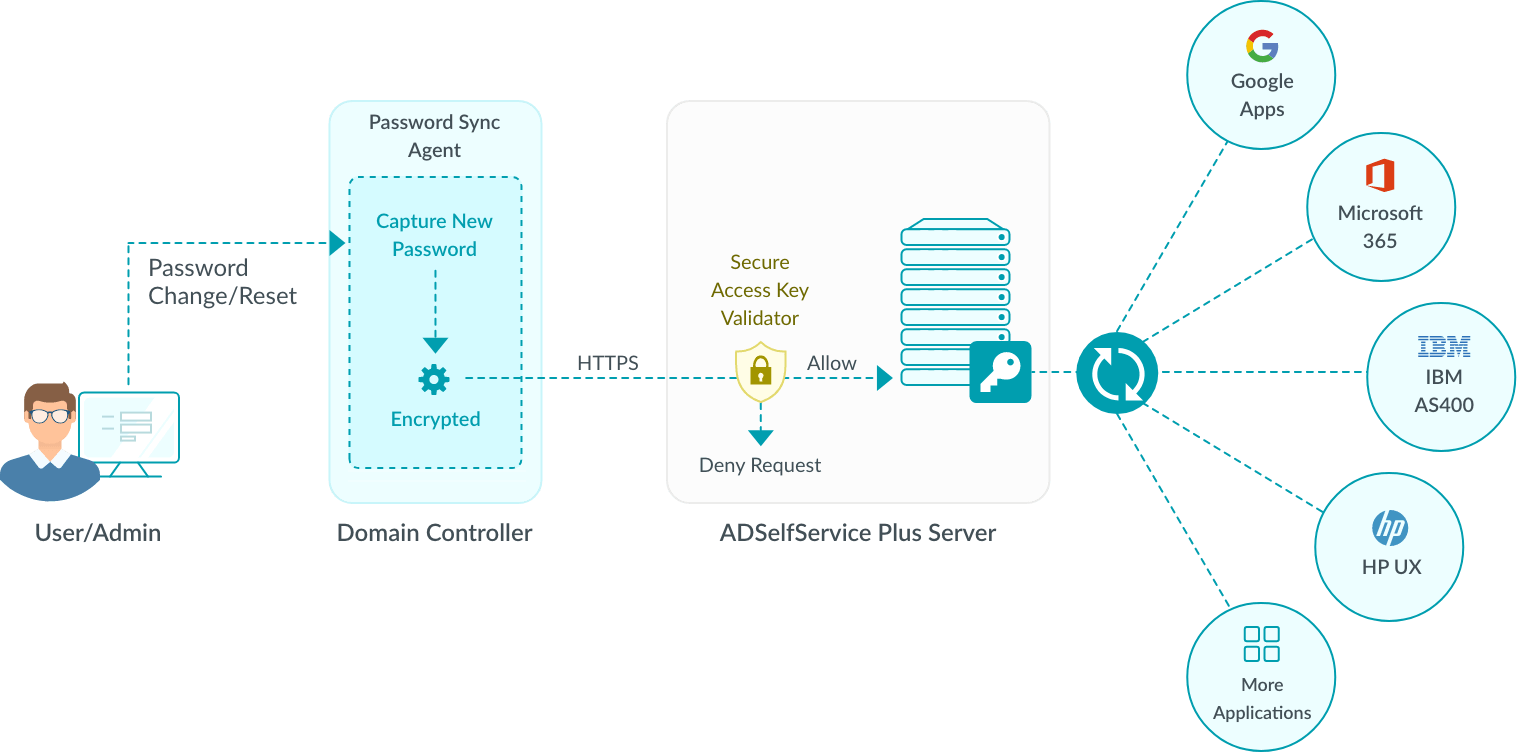
When a native password change is initiated, the Password Sync Agent is notified by the domain controller.
The Password Sync Agent captures the new password, encrypts it, and then sends it to ADSelfService Plus for synchronization.
ADSelfService Plus synchronizes the password with the user's various linked accounts.
In case the server on which ADSelfService Plus is running can't be reached, then the agent waits till the server becomes available, and then sends the encrypted password for synchronization.
Installation
Pre-requisites
The Password Sync Agent must be installed on all the domain controllers in a domain including the primary domain controller.
The domain controllers should have been a Full installation instead of a Server Core installation.
The domain controllers should have the Microsoft .NET Framework 4.5 installed. Even if you have higher version, please make sure you have .NET Framework 4.5 is also installed.
Make sure the Message Queuing service is enabled and is running before starting the installation of the password sync agent.
Installation Steps
Install the password sync agent (Location: <installation_folder>\bin\ ) using the command prompt with admin credentials.
Click Next.
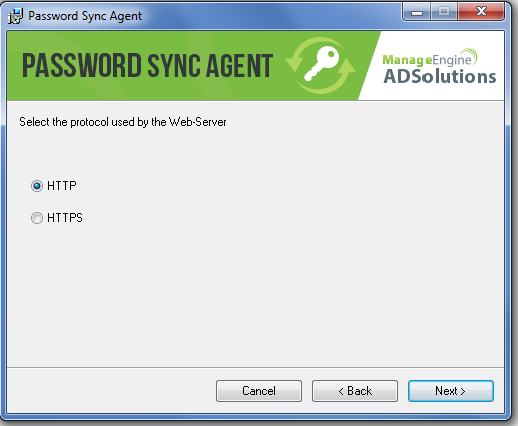
Select the Protocol (http or https) used in ADSelfServcie Plus
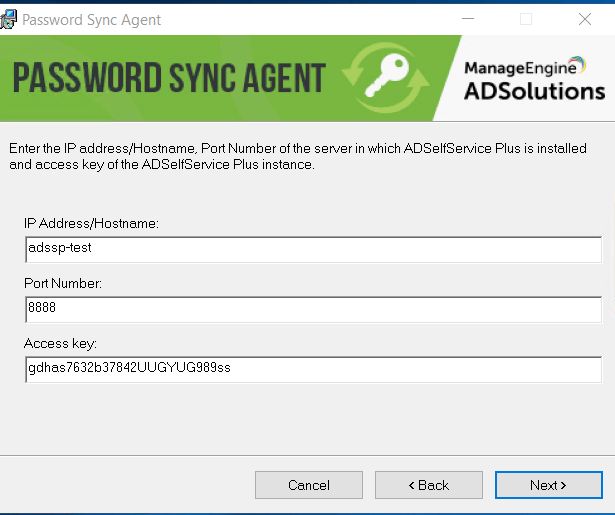
Enter the IP address and Port Number of the server on which ADSelfService Plus is installed and click Next.
Once the installation is complete you must restart the domain controller for the agent to start working.
Note: By default, the password sync agent will be installed in the following location:
In 64-bit systems - C:\Program Files (x86)\ZOHO Corp\Password Sync Agent
In 32-bit systems - C:\Program Files\ZOHO Corp\Password Sync Agent
Making changes to the Password Sync Agent
The Password Sync Agent connects with ADSelfService Plus using the IP address and port number details provided during installation. In the event that you have given incorrect details during installation or moved ADSelfService Plus to a new server, then the changes must be reflected on the password sync agent for it to work properly. The details can be changed by following the steps given below:
Right-click the Password Sync Agent icon on the System tray and select Edit Settings
The Edit Settings dialog box will open.
Enter the Server Name / IP Address and Port Number and Protocol (HTTPS/HTTP) used by ADSelfService Plus.
Click Save
The new details will be updated in Password Sync Agent.
Upgrading/reinstalling the password sync agent:
To upgrade the password sync agent to a newer version or to reinstall the agent on an existing machine, follow the steps listed below:
Uninstall the password sync agent from the control panel.
Install the password sync agent from the new MSI.
Note: Do not repair password sync agent directly from the new MSI file.
|
|